Why Do We Prune Trees?
-
Maintain the tree’s health
Removing dead, diseased, or damaged branches helps prevent decay and keeps the tree strong. -
Encourage flower and fruit production
Strategic pruning directs energy into growth areas, boosting blossoms and better-quality fruit. -
Enhance the view
Thinning out branches can open up scenic views and reduce visual clutter. -
Ensure proper clearance
Trimming prevents interference with structures, walkways, power lines, and vehicles. -
Prevent the tree from dying
Removing problem areas early on helps stop disease or pests from spreading and causing long-term harm. -
Increase sunlight and airflow
Pruning allows light and air to reach inner branches and surrounding plants, reducing mold and promoting healthy growth. -
Improve aesthetics
Shaping a tree enhances its natural beauty and contributes to a well-kept landscape. -
Extend the tree’s lifespan
Regular care reduces stress on the tree, helping it live longer and stay resilient.
Alpine Xeriscape Winning Combination
- Prunus Virginiana ‘Schubert’ (Chokecherry)
- Rosybloom Crabapple
- Clematis Macropetala
- Lonicera ‘Dropmore Scarlet’
- Rosa ‘John Cabot’
- Stachys Byzantina (Lanata)
- Salvia Transylvanica
- Picea Glauca (White Spruce)
- Lilium
- Nepeta ‘Dawn to Dusk’
- Astrantia Major
- Veronica Incana
- Laurel Leaf Willow
- Clematis Alpina
- Fox Willow
- Hosta ‘Gold Standard’
- Delphinium ‘Blue Bouquet’
- Rosa ‘Simon Fraser’
- Achillea Millfolium ‘ Summer Pastels’
- Lonicera ‘Dropmore Scarlet’
- Solidago Canadensis ‘Scabra’
- Achillea Filipendulina ‘Cloth of Gold’
- Alchemilla Alpina
- Geranium Sanguineum
- Scabiosa caucasica
Basic Steps for Landscaping Your Empty Lot
Not everyone can afford to hire a landscaper to overhaul their backyard in one go—and that’s okay! Most great gardens don’t start as masterpieces; they evolve over time with effort, money, and patience. If you’re ready to take your yard from “meh” to amazing, here’s a step-by-step guide to help you get there.
Step 1: Define Your Intention
What do you want from your yard? Is it a space for relaxation, play, hosting parties, sports, privacy, or curb appeal? Defining your goals will guide all your decisions moving forward.
Step 2: Layout Your “People Spaces”
Decide where you want functional areas like:
- Seating areas
- Storage
- Patios
- BBQs or outdoor kitchens
- Fireplaces or firepits
- Pathways
Step 3: Plan Your Beds
Sketch out where your garden beds will go.
Optional Step: Consider adding art pieces or water features. They can add personality and tranquility to your space.
Step 4: Lay Down Sod
Get your lawn started by laying sod or planting grass seed.
Step 5: Strategically Position Large Trees
Place trees thoughtfully throughout your garden beds. Keep in mind:
- Young trees need plenty of water, so plan for irrigation.
- Research how large they’ll grow over time to avoid crowding or damage to your home (a must for insurance!).
Step 6: Fill Spaces Between Trees with Shrubs
Shrubs are great for filling gaps between trees, but think long-term:
- Check the mature height and width of shrubs before planting.
- Some shrubs are easier to remove or replace later than others (e.g., mugo pines can be a hassle).
Step 7: Group Flowering Plants
For a more cohesive look, plant in groups of three. You can:
- Use three of the same plant to create a uniform cluster.
- Mix and match three complementary flowers for variety, and adjust placement later as they mature.
Step 8: Repeat Plantings
Repetition creates harmony and continuity in your garden. Use the same plant combinations throughout your yard for a polished look.
Step 9: Plant Your Own Seeds
Starting from seeds is an affordable way to grow your plant collection in large quantities without overspending.
Step 10: Incorporate Grasses
Grasses add texture, structure, and interest to your flower beds. They’re also low-maintenance and easy to split and transplant later.
Step 11: Add Vines and Climbing Plants
Vines are perfect for softening fences and other structures while also creating natural privacy barriers.
Creating a beautiful backyard doesn’t happen overnight, but with time and thoughtful planning, you can transform your space into something incredible.
Credits and Sources:
Polachic, Darlene. “Rules of the Gardening Road” Gardens West, vol. 20, no. 6, July August 2006, pp.65-75
Preventing Dog Destruction of Gardens

You love cultivating your garden, but your dog might have other plans! When it comes to keeping your furry friends safe and maintaining your garden, there’s no need to compromise—you can enjoy your flowers and keep your pup out of trouble.
Dogs Are Destroying My Flowers, Shrubs, and Trees
Management Tips:
- Training: Train your dog to use a designated bathroom area. Mulch or gravel works best—it’s effective and keeps plants safe.
- Exercise: Make sure your dog gets plenty of physical activity. Bored dogs are more likely to chew on your plants.
Plant Replacements:
- Shasta daisies and catmint are hardy and more dog-resistant.
Garden Adjustments:
- Fence in your garden plots to keep dogs out.
- Use hanging containers or seasonal pots to elevate your plants.
- Add water features, garden art, or rock features to beautify your garden while limiting access to delicate plants.
Dogs Are Killing My Grass
It’s a fact: all dogs can damage grass, regardless of breed or gender. And no, it’s not about their urine’s pH. Those “grass-protecting” supplements? They’re not scientifically proven, and their safety is questionable. So what can you do?
Management Tips:
- Training: Like with flowers, train your dog to use a designated bathroom area. Mulch or gravel is still the gold standard.
- Provide more water: Keeping your dog hydrated dilutes their urine and reduces damage.
- Repair spots promptly: When you see a yellow patch, rake out the dead grass, apply fresh soil, and reseed. (Skip the home remedies like baking soda—they don’t work.)
- Fertilize regularly: Nitrogen spots will stand out less in a well-fertilized lawn. Just don’t overdo it, or you risk burning your grass.
- Increase irrigation: Frequent watering helps dilute salts and prevents drought stress.
Grass Replacement Options:
- For a Kentucky Bluegrass lawn, spot-seed with Kentucky bluegrass or perennial ryegrass.
- For Tall Fescue lawns, use dwarf fescue seed.
- For Fine Fescue lawns, stick with fine fescue seed.
- For Zoysiagrass or Bermudagrass lawns, transplant or lay sod for the best results.
Alternative Solutions:
- Artificial turf: If you go this route, invest in a high-quality product and professional installation. Cheaper turf tends to smell over time, even with odor eliminators. Please note; artificial turf requires monthly maintenance and needs replacing after about 10 years.
- Hardscaping: Consider laid bricks, stonework, or stamped concrete as permanent, dog-proof lawn alternatives.
Final Thoughts
Maintaining a beautiful garden while keeping your dog safe doesn’t have to be a battle. With a mix of management, replacement, and creative solutions, you can have the best of both worlds.
Credits & Sources
Polachic, Darlene. “Pots, Pots & More Pots” Gardens West, vol 20, no. 6, July August 2006, pp. 5-16.
Best Layout for Vegetable Gardens
Plant in Blocks, Not Rows!
When it comes to making the most of your garden space, planting in blocks or beds is a game-changer compared to traditional rows. For example, plants that can be spaced 2 inches apart can fit four times the number of plants in a bed compared to rows.
If Harvest Moon taught us anything, it’s that beds are the way to go! And it’s not just a gamer tip—science and experienced gardeners back this up.
Why Plant in Beds?
- Less wasted space: No need for wide pathways between rows.
- Healthier soil: You’re not walking on it, so it doesn’t get compacted.
- Better weather protection: Plants are less exposed to temperature extremes.
- Water conservation: Beds shade the soil, reducing evaporation.
- Easier planning: Beds are simpler to prep, plant, and maintain.
- Ergonomics: Less bending while cultivating, thinning, or weeding.
- Better resource calculation: Knowing your bed size makes it easier to figure out how much compost or amendments to add.
“Planting in beds is a more efficient use of garden area than rows. For plants that can be planted at 2″ spacing you can have four times the number of plants” – Pete Amyoony
Raised Beds or Flat Beds?
The choice depends on your soil type and climate:
- Weedy areas: Start with temporary beds (no permanent boards, rocks, or bricks) so you can fully remove invasive weeds like quackgrass. These pests love sneaking under hard structures.
- Sandy soil in a hot, dry area: Stick to flat beds—raised beds will dry out too quickly.
- Rainy areas with heavy clay soil: Raised beds are a must for proper drainage.
Bed Size Tips
- Keep beds 4 feet wide or less—make sure you can comfortably reach across without stepping on the soil.
- Standardize your bed dimensions so you can easily swap cold frames, row covers, trellises, or other garden supports from one bed to another.
Mix in Flowers with Your Veggies
One last tip: Add bee-friendly flowers to your garden! Marigolds, Catmint, Bee Balm, Calendula, Borage, and Cosmos are great for attracting pollinators and making your garden even more beautiful.
Have you tried planting in beds instead of rows? Which method worked better for you? Did you notice any difference in your harvest? Let me know in the comments—I’d love to hear about your experience!
Credits & Sources
Amyoony, Pete. “Off To Your Beds!” Gardens West, vol. 24, no. 6, May 2007, pp.22-24
“CMG GardenNotes #713: Block Style Layout in Raised Bed Vegetable Gardens.” Master Gardener Colorado State University Extension Garden Notes, April 2023, Garden Notes
What is Lovage?
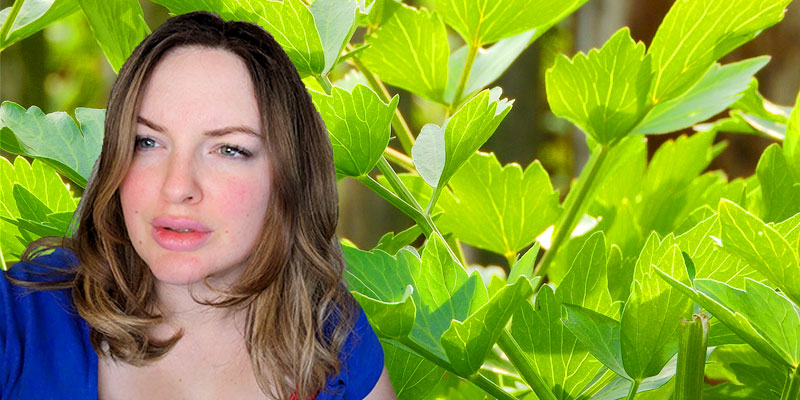
Lovage: The Herb That Thinks It’s Celery
Lovage is that surprisingly tall plant in the garden that looks like celery but smells like parsley on steroids. It’s a culinary herb—and also has a history as a medicinal one.
As Leslie Cox once said:
“Lovage, Levisticum officinale, is one of those herbs you either know and grow or you know almost nothing at all about. Those of us who do grow it have learned to appreciate this herb for a multitude of reasons.”
What Does Lovage Look Like?
If you’re not sure how to identify lovage, here’s what to look for:
- Bigger than celery: It’s tall—like, really tall.
- Hollow, ridged stems: Looks like celery but definitely isn’t.
- Yellow flowers: If you let it bloom (though you might not want to—more on that later).
- Green, thin, veiny leaves: Shiny and distinct.
How Do I Grow Lovage?
Key Tips for Growing Lovage:
- Harvest before it seeds: Seriously, it will spread everywhere if you don’t.
- Sunlight: Full sun to light shade.
- Watering: Keep it watered—lovage will droop or collapse if it doesn’t get enough.
- Soil: Prefers humus-rich soil but can handle heavy clay if you’re attentive.
- Staking or Cutting: Stake it early to keep it upright, or cut it back to 12″ to encourage fresh young leaves.
- Divide every 3 years: Keeps the plant healthy.
- Composting caution: Some pesky insects might use the stems to lay their eggs.
How Do I Eat Lovage?
Lovage is edible in all its parts: seeds, stems, leaves, and even roots. Here’s how you can use it:
- Culinary uses: Toss it in stews, salads, soups, baked bread, mashed potatoes, or rice dishes.
- Roots: Apparently, you can grate and cook the roots—though I’m not totally sold on the idea yet (but hey, why not try?).
- Tea: Make a lovage tea to aid digestion and reduce water retention (check with your doctor first!).
If you’re ever in a pinch and find yourself with no celery but loads of lovage, it can work as a spicy, celery-like substitute.
Final Thoughts on Lovage
There you have it—the quirks and uses of parsley’s bigger, bolder sibling. If you have a refined palate, you might find a whole new appreciation for lovage. But what do you think? Is lovage worth adding to your garden? Have any favorite lovage recipes? Drop your thoughts in the comments—I’d love to hear them!
Credits & Sources:
Cox, Leslie. “Don’t Pass Up the Lovage” Gardens West, vol. 20, no. 6, July August 2006, pp.58-59.

